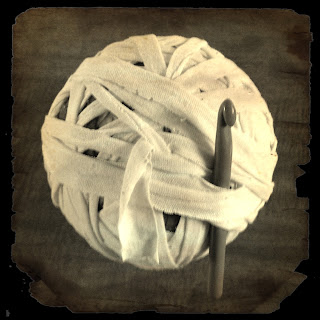
So, after having a few days to think about it I've decided on my t-shirt project. I love big thick heavy blankets, so I'm making a queen size blanket for my bed. I know it will be heavy since I have rag rugs.
After making my decision on this project, I looked around to see if I could find any specific tutorials, but there were none that matched this project! I know I can't be the first person to ever attempt this, so I decided to share my experience with the world. This is my journey in making a queen size crochet t-shirt blanket.
How many t-shirts do you think it will take? I am using all different sizes and types of t-shirts, from toddler to XXL adult.
I am using a fleece blanket as size guide because I love how it drapes on my bed. However, if you don't have a blanket to go by, here are some basic measurements:
In America, the "standard" sizes for blankets are as follows:
Crib: 45 by 60 inches
Twin: 66 by 90 inches
Double: 80 by 90 inches
Queen: 90 by 90 to 100 inches
King: 108 by 90 to 100 inches
The blanket sizes are from About Knitting.
See you soon!
Ms Vee
Most Popular Posts of All Time
-
I just found out today that one of my cousins had a little bitty 6lb 13oz baby girl! YEY! Congratulations! So, to celebrate I figured w...
-
Today, instead of working on my t-shirt blanket, I am starting a new project. (In case you missed my last post, I ran out of t-shirts and am...
Monday, July 30, 2012
Friday, July 27, 2012
T-Shirt Blanket Day 1: Big Ballin'
I've been wanting to make something great with all of these old t-shirts the are hanging around my house. I ran across a perfect tutorial for cutting fabric into continuous strips at the Laughing Purple Goldfish.
This is the same method I have been using for cutting plarn (plastic bags into yarn.) it works very well, but I've made a few special notes since I'm dealing with t-shirts not pillowcases. Some say not to use screen printed shirts, however I am using these. I haven't had an issue yet and I rather like the look. There must not be any holes in the t-shirts. Make sure three is no embroidery, buttons or other embellishments on the body of the shirt. Other wise, I have been following their tutorial for cutting my shirts into 1" strips.
I began to roll them into a ball. As I got to the end of a t-shirt, I joined the next one to it using a tight zig zag stitch on my sewing machine. I then cut off the excess and continued winding my ball. After day 1 of cutting I had 9 t-shirts cut and rolled.
Also, a special thanks to Maryse at Just Maryse for the idea for the name of my blog. I know you are mainly a knitter, but I'd truly just rather be hookin'!
Ta Ta For Now,
Subscribe to:
Comments
(
Atom
)


